
Duckling Pattern
by Raha Esmaili Zaghi
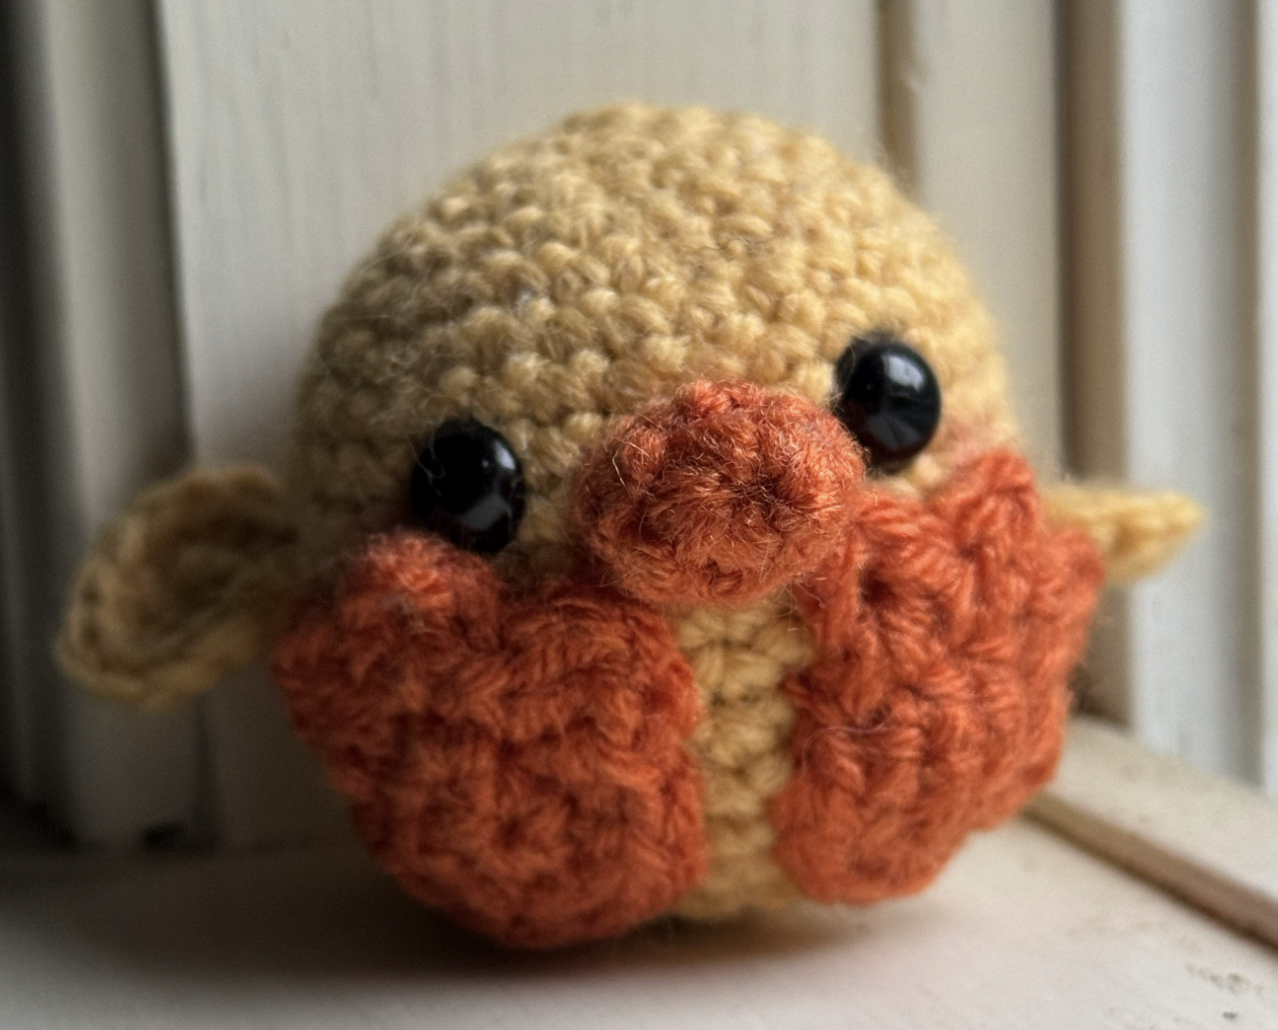
(Worked in continuous rounds unless stated otherwise)
Materials
Worsted/medium-weight yarn (you can also use other types)
Yarn in Color #1 (Main Body – yellow)
Yarn in Color #2 (Accents – orange)
Crochet hook appropriate for your yarn
A hook about 1 mm smaller than the suggested size is recommended for amigurumi to prevent stuffing from showing through.
Fiberfill stuffing
Safety eyes
Scissors
Yarn needle
Blush (optional)
Note: You may use thicker or thinner yarn depending on how large you want your duckling to be. Use the same yarn weight for all parts and a crochet hook appropriate for the yarn thickness.
Body
With Color #1
Round 1: MR, 6 sc (6)
Round 2: inc in each st (12)
Round 3: (sc, inc) x6 (18)
Round 4: (2 sc, inc) x6 (24)
Round 5: (3 sc, inc) x6 (30)
Rounds 6–15: sc around (30)
Insert safety eyes between Rounds 8 and 9, approximately 5 stitches apart, counting from the edge of the eyes.
Round 16: (3 sc, dec) x6 (24)
Round 17: (2 sc, dec) x6 (18)
Stuff the body after Round 17. Do not overstuff, as this may create gaps where the stuffing can show through.
Round 18: (sc, dec) x6 (12)
Round 19: dec x6 (6)
Fasten off, leaving a long tail for closing. Sew the opening shut and weave in the end.
Wings (Make 2)
With Color #1
Round 1: MR, 6 sc (6)
Round 2: inc in each st (12)
Fasten off, leaving a long tail for sewing.
Sew the wings onto the sides of the body, one row below the edge of the eyes and approximately 5 stitches to the side. Sew only the top of each wing so that the wings can flap.
Weave in the remaining yarn.
Beak
With Color #2
Round 1: MR, 6 sc (6)
Rounds 2–3: sc around (6)
Fasten off, leaving a long tail for sewing.
Flatten the beak so that it becomes more two-dimensional, with the sides of the dome touching each other. Sew the beak onto the body, centered between the eyes.
Weave in the remaining yarn.
Feet (Make 2)
With Color #2
Round 1: MR, 6 sc (6)
Round 2: inc in each st (12)
Round 3: (1 dc, ch 3, sl st into the same space as the dc) repeat 3 times, working each sequence into the next space. This is not a complete round.
Fasten off, leaving a long tail for sewing.
Sew the feet onto the front of the body with the toes pointing upward and slightly outward relative to the eyes. The bottom of the feet should be approximately 5 rows from the bottom center of the body. The closest sides of the feet should be approximately 2 stitches apart.
Weave in the remaining yarn.
Assembly
Attach the safety eyes between Rounds 8 and 9.
Sew the wings onto the sides of the body.
Sew the beak between and slightly below the eyes.
Sew the feet onto the front of the body.
Shape the body with your fingers as desired.
Add blush to the sides of the eyes for an optional kawaii effect.
You can create a small indent in the lower back so the tail can stick out.
Your duckling is finished! Enjoy your new buddy! 🐥